
The complete beginner’s guide from an experienced barista
This article is about the art of extracting the perfect espresso at home like the professionals.
More often than not, coffee has become an afterthought: a means to a happier start and an unorganised ritual in our days. Yet, coffee is so much more than that; engrained in espresso is science, art, complexity, flavour and depth.
Did you know that coffee beans, like many of your favourite foods, undergo the Mailliard reaction when exposed to heat? Around 500 hundred complex flavour and aroma compounds come to the forefront after your coffee beans have been roasted. This is, in fact, more than the 200 recognised compounds in wine.
I think it’s time to start respecting our morning brew.
But before all that, a little about me: I owned and operated three cafés in the heart of Melbourne.
Collectively, between the three cafes, we ordered 200 kilograms of coffee a week, which translated to 4000 coffees brewed and poured.
Every morning, and I mean every morning, I was at one of the cafés dialling in the machine and setting up for the busy day ahead. So, it’s safe to say I know my way around a coffee machine and can help you pour the perfect espresso.
In this article, we will discuss:
- Buying your beans.
- My tried and tested coffee recipe.
- What do we need to pull the perfect espresso?
- The importance of grinding your beans properly.
- Dispensing, dosing, and grooming.
- What to look for when you are tamping.
- And finally, Pulling your shot.
Buying your beans
I want to emphasise the importance of buying your beans from a roaster. Your roaster will have an in-depth knowledge of their products, brewing practices, and advice that you, as a consumer, just wouldn’t be privy to if you were buying off the shelf at your local supermarket.
Roasters roast with a recipe in mind. Following their recommended extraction parameters will help you pull the perfect espresso.
My tried and tested coffee recipe
At my cafés, we had 20-gram baskets; our brewing recipe was 20–21 grams, with pre-infusion, a drop time of 5–7 seconds, and a total run time of 28–30 seconds for a double espresso.
If your roaster doesn’t specify a brew recipe, mine is a good place to start. It should get you somewhere in the ballpark of a great double espresso.
So, in this article, we will use 20 grams of coffee and 30 seconds of extraction as our recipe metric. However, you can always change that to work with your brew recipe. The principles here hold up regardless.
So, what do we need to pull the perfect espresso?
- A coffee machine
- A grinder: Some machines will have a built-in grinder
- A set of precision scales
- A timer: Personally, I always used my phone timer for this
- A tamper
- A spoon
- A tea towel or cloth you’re happy to get dirty
The stages of making an espresso
- Grinding
- Dispensing and dosing (grooming)
- Tamping
- Pulling the shot
Grinding
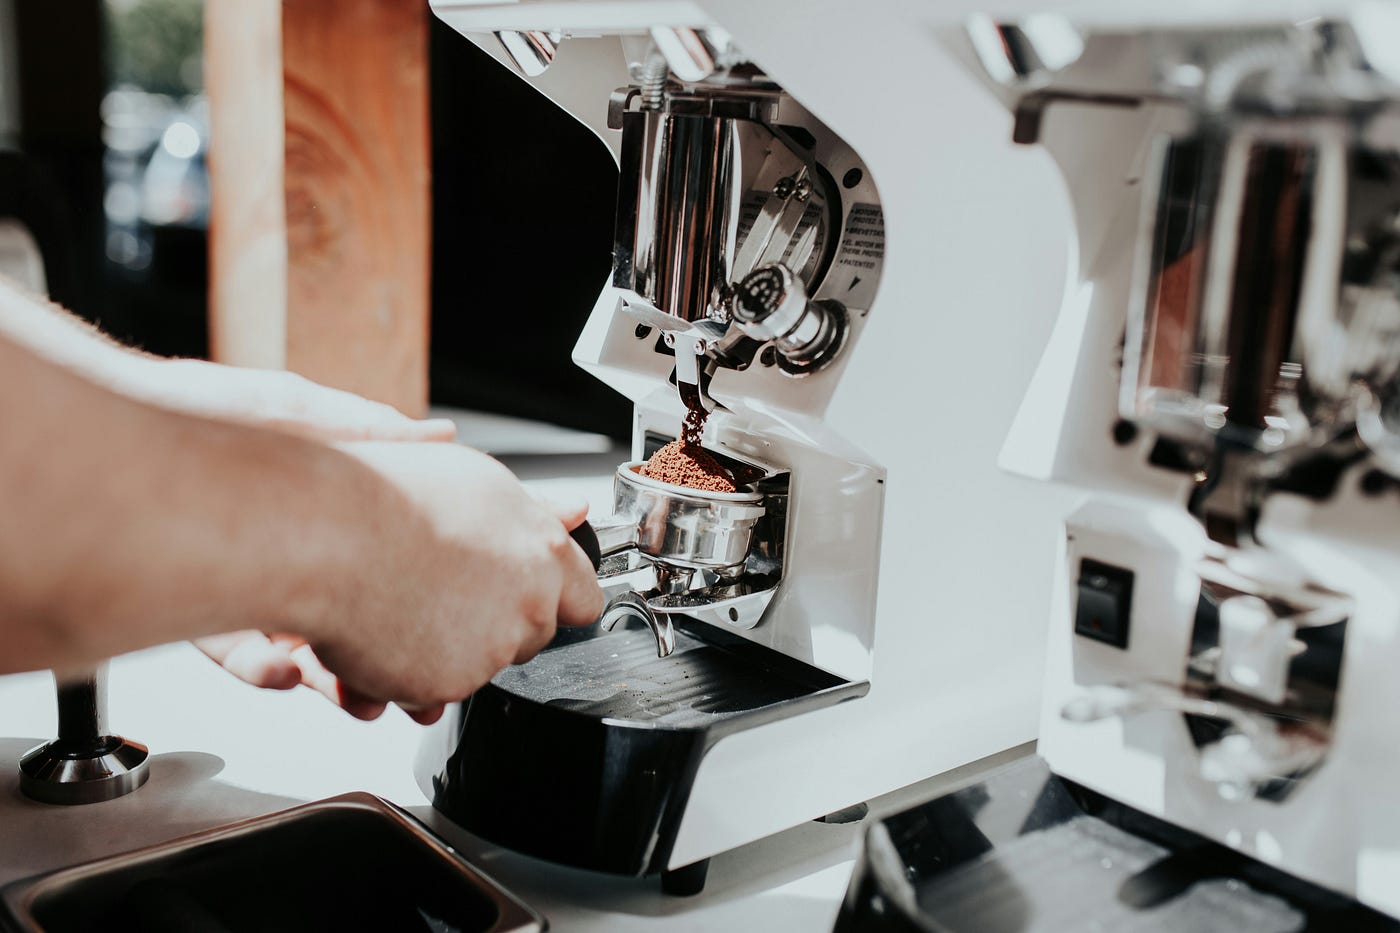
The first step is to turn your beautifully roasted coffee beans into something we can manipulate with water. To do that, we need to grind them. Grinding coffee beans increases their surface area, allowing the hot water to come into contact with more of the beans to extract the flavours present from roasting.
To grind your beans, add them to the hopper and select your grind- espresso grind is much finer than the setting you would use for immersion brewing. Then, commence grinding.
Each grinder is different, but grinders will have either a lever or a button that controls the outflow of coffee through the shoot; it will be clearly identifiable.
Grinding is the most crucial step when making espresso. When you use your coffee machine, hot water under pressure violently forces itself against the puck: the bed of roasted, ground coffee beans in your basket.
The pressure used to propel the water can reach as high as 10 bar, creating the unmistakable characteristics of espresso we know and love.
Some grinding basics
If your coffee is ground too coarse when you pour your shot, it will run too quickly, creating an acidic-tasting shot.
Alternatively, if it’s too fine, you will be waiting for an age for the coffee to pour — over-brewed coffee will be bitter, and bitter profiles send shockwaves to our brains: an add-on from our time as hunter-gatherers trying to warn us something might be poisonous.
It’s important to remember that with most grinders, immediately after the coffee has passed through the burrs and been ground, there is a small chamber where the coffee is stored, so you will have to flush that stored coffee to see the effects of changing the grind size.
Dispensing, dosing, and grooming
Place the group handle on your precision scales to weigh your dose, tare the scale, and insert your coffee into the basket.
Grooming is the act of adding ground coffee or removing excess coffee from the basket to reach your desired dose. For example, if my grinder spat out only 18 grams of coffee, I would add two extra grams to my group handle.
It’s no different from weighing out your flour for a cake. I find that using a spoon is the best way to reach your desired dose. It gives you the most accurate control.
Tamping
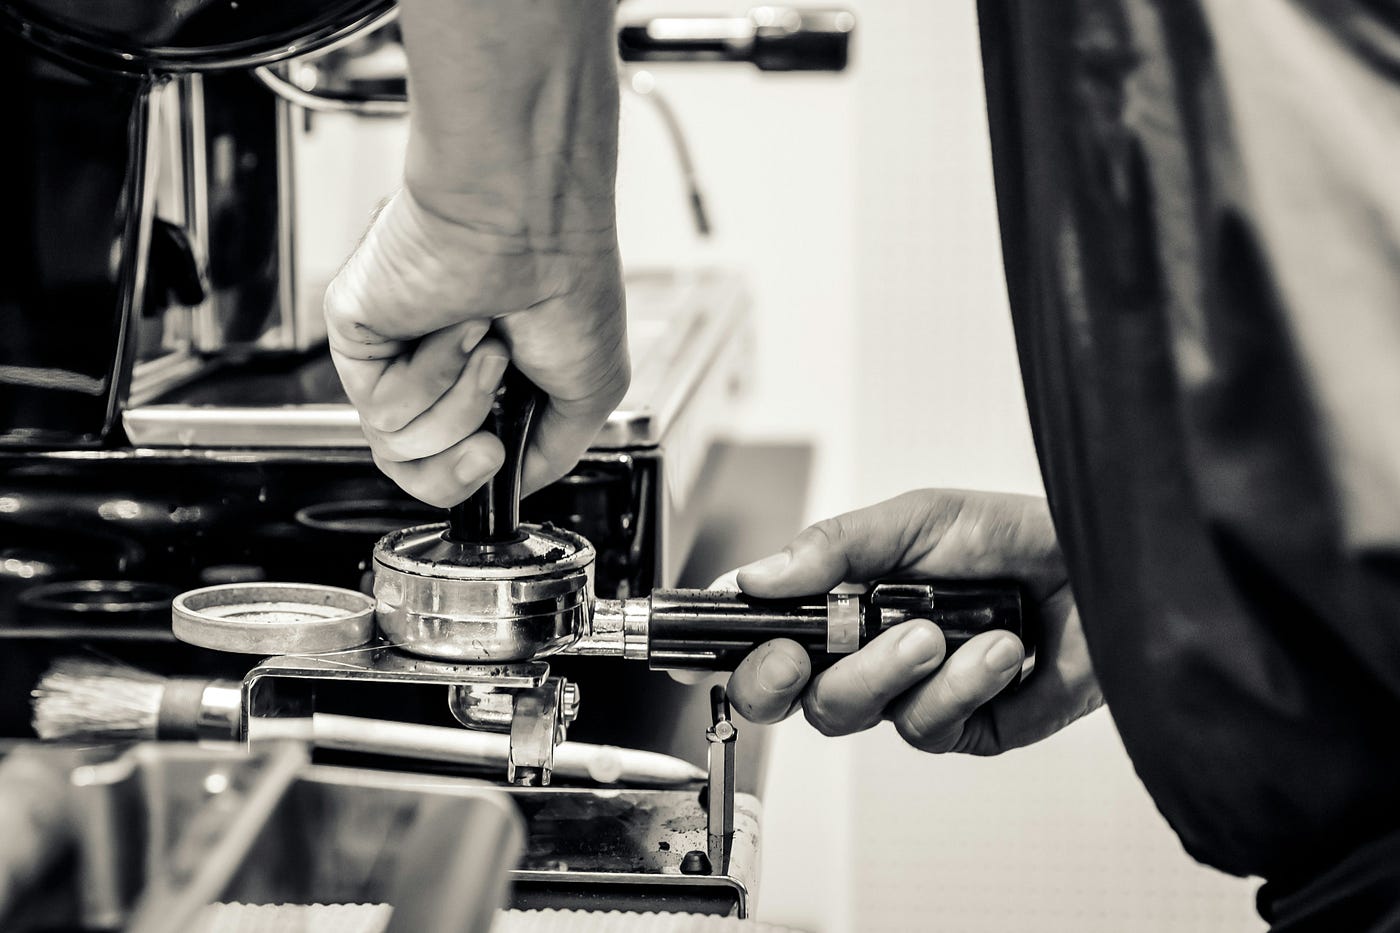
Tamping is a crucial part of the process. It’s pressing your ground coffee to create a firm puck that will resist the pressure of the hot water. New baristas often try to press as hard as possible to make the ‘best’ puck.
It’s far more important to ensure your puck is levelled when compressed.
So, when you tamp, focus on creating a solid puck that is perfectly flat with no visible cracks. I was always taught that once you have tamped, you never return for another go. We want to avoid the possibility of channelling, which occurs when water slips through a ‘crack’, creating a watery and weak shot. Water will always take the path of least resistance.
Pulling the shot
To pull your shot, purge the group head. Purging your group head is as simple as pressing the button and allowing water to fall into your drip tray. This serves to bring your group head up to temperature, but it also helps remove any straggling coffee grinds that have already been extracted.
Then, interlock the group handle, with your perfectly tamped and level puck, into the group head.
Next, extract your coffee by pressing the button on your machine. When you press the button on your machine, start your timer.
Some machines have a pre-infusion setting. If you have it, it’s recommended that you use it because it reduces the chances of a channelled shot.
If your coffee runs longer than 28–30 seconds, your coffee grinds are too fine, and you need to make your grinder setting coarser.
If your coffee runs for less than 28–30 seconds, it means that your grind setting is too coarse, and you should make your coffee grind finer.
I always remembered this best with the thought exercise of pebbles and sand in a jar. With only pebbles, the water would rush to the bottom. However, with only sand in the jar, the water would take longer to find its way to the bottom. It’s the same principle with your coffee grinds.
So, you’ve poured your first shot, and hopefully, you can recognise any issues. And if there are no issues, that’s brilliant, but let’s run another shot to be safe.
Just repeat the process: Clean your group handle, purge your group head, grind your beans, weigh your dose, tamp your puck, and pull your shot. Do this repeatedly until you are comfortable with your coffee pouring beautifully each time.
I find it best when you empty your extracted puck to clean out your basket with a dry cloth so there is no lingering coffee extract.
As we already know, over-brewed coffee tastes bitter, and we’re searching for the perfect cup, right?
In my cafés, the procedure was to ensure the espresso was pouring for 28–30 seconds without having to make adjustments three times consecutively. That might be a little extra if you’re at home, but it’s something to bear in mind.
And there you have it; you’ve extracted the perfect espresso like the professionals. All you have to do now is sit back and enjoy your morning brew.
Have you ever thought about including a little bbit more than just youjr articles?
I mean, what you say is fundamental and everything.
Nevertheless think about iff you adfded some great graphics or video clips
to give your posts more, “pop”! Your content iis excellent but with pics and clips, this website could undeniably be one oof the most beneficial in its field.
Great blog! https://Lvivforum.Pp.ua/
Hey!
Thank you for the feedback. I’ll make sure to make them pop more in the future! Thank you for posting!